HomeAboutFreebies

Tuesday, February 28, 2012

Presidents day

We weren't in school for Presidents day. Well, I should say the kids weren't in school, it was a plan day for me. The previous Friday and following Tuesday I had some ELL testing and didn't see my students either. I went almost a whole week without seeing. When I was done I had a 3 day week, so I took that time to really go over Presidents day and work on those very cute activities I have found on other blogs. 

I can't say I created anything original. We did activities very similar to last years, just tweaked a bit.
Wednesday was all about Washington, Tuesday was all about Lincoln, and Friday we compare the two, talked about the presidency, and who is our current president.

The Kindergartners made those cute Washington and Lincolns.
School A
School B

 A close up of George...
and Lincoln.
 Of course I had to add our current President. I was not surprised, but pleased to know that most of my students, knew who he is and could tell me his name. It may not sound like a big deal, but when you just came to this country and can't even really ask a question, or share a story it is a big deal.
 We then proceeded to complete a Venn-Diagram comparing the two.
I printed a large one and completed it with my students, as a model. That is the one I displayed. I used my Doc Cam and projector so my students could see and they completed one of their own at their desks that they get to take home. I got this Venn-Diagram from Sarah Paul's Freebie President Unit.
The Washington and Lincoln templates I got from Mrs. Larremore's blog Chalk Talk.

I wanted something a bit more for my First grade students.
I had the students color, cut and paste the president from these template I found on Pintrest. Then I used the facts from Mrs. Thiessen's compare and contrast activity. I can't fr the life of me find the Lincoln and Washington templates. If you know where to find them please leave me a comment so I may share the source.
School A

School B

We read...
to talk about each president. We read the Washington page when we learned about GW and the Lincoln page when we learned about AL, and the Obama page when we learned about BO. Here are a few screen shots.
 
 I love the illustrations. It does have ALL the presidents, I just did not want to overwhelm my students.
 
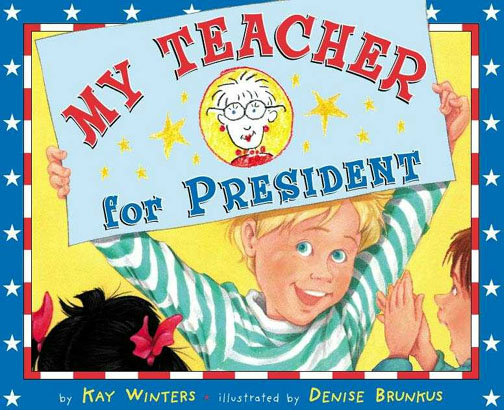
On Friday we read...
and talked about what a President does.

Then we completed this "If I were President I would..." sheet.
 "stop the state of fighting people."

 "help people to clean up."

 "help the people with stuff."

 "go to the white house and work." This one made me crack up.

"I would free the slaves." This one made me think he was thinking about the Civil war, because we did talk about it a bit when we were learning about Lincoln. However, after going home and reflecting on it, I wondered if he was making a connection with his home country, where they are in fact still a great deal of oppression, slavery and war. It made me sad and glad that he is now here in the US.

One of the other resources I used were some Brain Pop videos.
George Washington
Abraham Lincoln
What the President does.

The kids really seems to get it so much better with the videos and they were able to tell me so much more than I thought they would. I was pleasantly surprised.

This week is all about Seuss, and I am as crazy as the Cat in the Hat himself! :P I have a formal observation tomorrow so wish me luck.

Monday, February 27, 2012

Student Art Feature: Bronze & Silver Clay Portraits

I am back with another Student Art Feature. I have not had a chance to get my act together enough to get all the things I want to say out here so I am going with this today. Maybe later this week I can share all the goodies my students and I have been working on.

This is my second favorite student art feature.
(My favorite is yet to come.)
I was kind of taken aback by how creative, simple, and how professional these student portraits look.
Here are two far away shot of the whole bulletin board they are displayed on. The shot is not a great one. Again I was walking around with my iPhone snapping pictures in the hall. I must have looked like a weird teacher.
 Anyway, this is just so you can get a perspective of how they look from afar.
 The real magic happens when you get up close.
 They remind me of coins. :)
  When I talked to the art teacher she shared with me that the kids made the faces out of clay on some tag paper. The clay dried and then she came in on the weekend to spray paint them all in the gym.
 She also shared that all the doors were open and the gym stunk for 2 days! So if your going to recreate please keep that in mind.
 In my opinion, they are amazing.
 I feel like I could see them on display at some museum or gallery.

These were done by 1st graders. :) I love how different each one is.

I hope to be back this week with our very late Presidents days activities and some long over due Organization projects. That is right, I fell off the Organization train, but I am back on now, just a few weeks late. :P

Have a great day!

Thursday, February 23, 2012

Student Art Feature: Tissue Paper Portraits

As I was walking my ELL students back to their homerooms, I came across some  wonderful student art in the hallways. If you recall, not too long ago I shared the Layered Character Portraits. I wanted to share the new artwork I found today too. I think I will make this a regular thing and call it "Student Art Feature." 

Today's feature will be all about using tissue paper to make character portraits.
Take a peek.
 It doesn't look too hard. I did something very similar when I was in school. I think, which is always a dangerous thing, that you sketch your image, then lay the tissue paper down. Next you dilute your glue a bit with some water, not too much, and apply your glue like paint with a paint brush.


 What I love best about these is how you different they all are. They remind me of the Tod Parr books. I am just thinking of all the writing activities you could tie into these just by having the kids write about their feelings, or what they think the colors in the portrait are supposed to reflect, maybe even an inference lesson.


The pictures really don't do them justice. They are so striking in person.


Tuesday, February 21, 2012

Beginning, Middle & End

In my district we teach writing with the 6 traits. My kinder kids just got done with Organization. I know I have previously mentioned that we use the "O Train" to help us teach this skill. 
The O Train really helps my, very visual, ELL students. They can easily see that the train has 3 parts, just like their stories. This is how I introduce it to my student...
The first, or beginning, train is the engine, and it is green, for go! That is the start of our stories and helps to lead, like a line leader. The second car is the middle, the most interesting and exciting part. This cart is yellow, and helps us to slow down. The last car is the end and is red. This means stop and the end of our stories.
For my ELL kids I also transferred these images to their writing paper, without the color of course. Here is a freebie for you. Again, this is what my Kinder Kids use, not my 1st graders.3 pg bk 3 lines a
As you can see, I have added the train parts to each page to help my students remember what part they are working on. This also helps them to not start a new stories on each page. They are to stretch their stories out to have a beginning, middle and end. I also added 1st, 2nd and 3rd to the trains.

Before my students begin to write they have to plan their stories. I have a couple planning pages that go with the writing paper but I find that if you have enough time for them to complete a story it is best to have the students touch each page and say what they will draw and write on the lines. However, because I don't have a lot of writing time with my ELL students I do use the planning pages. Just click on the image below.
The students are only supposed to sketch their story in 3 parts quickly. The reason for this sheet is for students to remember what is supposed to come next and last.  When completed my students staple this page to their book and can transfer their illustrations and story.

Once all that is taught and becomes routine I teach leads and transition words. Sounds like a lot for a Kindergartner? It may be but some kids get it, and others will at least have been exposed to it and will have some sort of foundation when they get older. 

I teach leads as "Story Starters". They "lead" the story, like our engine and line leader. We talk about good ways to start a story and how it is pretty boring to always start with "I". "We", I, brainstorm possible ways to start our stories, out loud and create a list. I type the leads on my laptop and have my kids watch. This way I have a clean poster that the students recognize. The story starters are mounted on green construction paper to match the train's engine.
In a few days time I introduce transition words. No surprise they are also color coordinated to match their cars.
I realized once I had them up I should have added the trains to them too. Oh well, they color will have to be enough.
Finally, (like my transition word?) I also print these on colored paper and place on the board for easy referencing.
Most kids won't use transition words. Only the really quick kids will pick up on it. However, I find that having them up and referencing them when I model writing really helps my students understand what I am talking about. They start to use them when they are talking, which is a fantastic side effect for me as an ELL teacher.

Another way we practice telling our stories in 3 parts is with 3 hula hoops or 3 squares (made with masking tape) on the floor. The kids step in a hula hoop or square and tell the beginning, middle and then the end. The hula hoops are nice because they can be removed and put away. However, the squares are nice too because they can be used for other activities like retelling stories, blending and segmenting, sorting items or even math equations.

So one more freebie for you... the transition posters. Just click on the links below to get a copy for your room.

All this takes a couple months to get through and I probably spend a whole quarter on it. I also use the beg, mid and end strategies to help us retell the stories we have read. I love it when my students start to recognize and pick out the leads and transition words in the reading text. They get so excited. It is a great way to help them understand this is not just a writing skill but a life skill.

One last thing. In School B they created a different planning page and 3 page book, with transition words already on the page. This all comes stapled together already and is less work for the students. Of course I added some trains. If you are interested you can click on the image below to get your own copy.

Wow, lots of freebies! I hope you find some of them helpful. If you download and use these, please leave a comment. I'd love to hear what you think, how you use them or if you do something differently.